Friday 22 July 2011

steps 5 advance layering


In this last part of my e-wallpaper which is advance layering, i used create clipping mask to the 'open day'.
First, i moved the purple background image to the e-wallpaper and fully covered the word 'open day'. Then,change the name of the layer to 'purple'. Right click the layer and  select ' create clipping mask'.

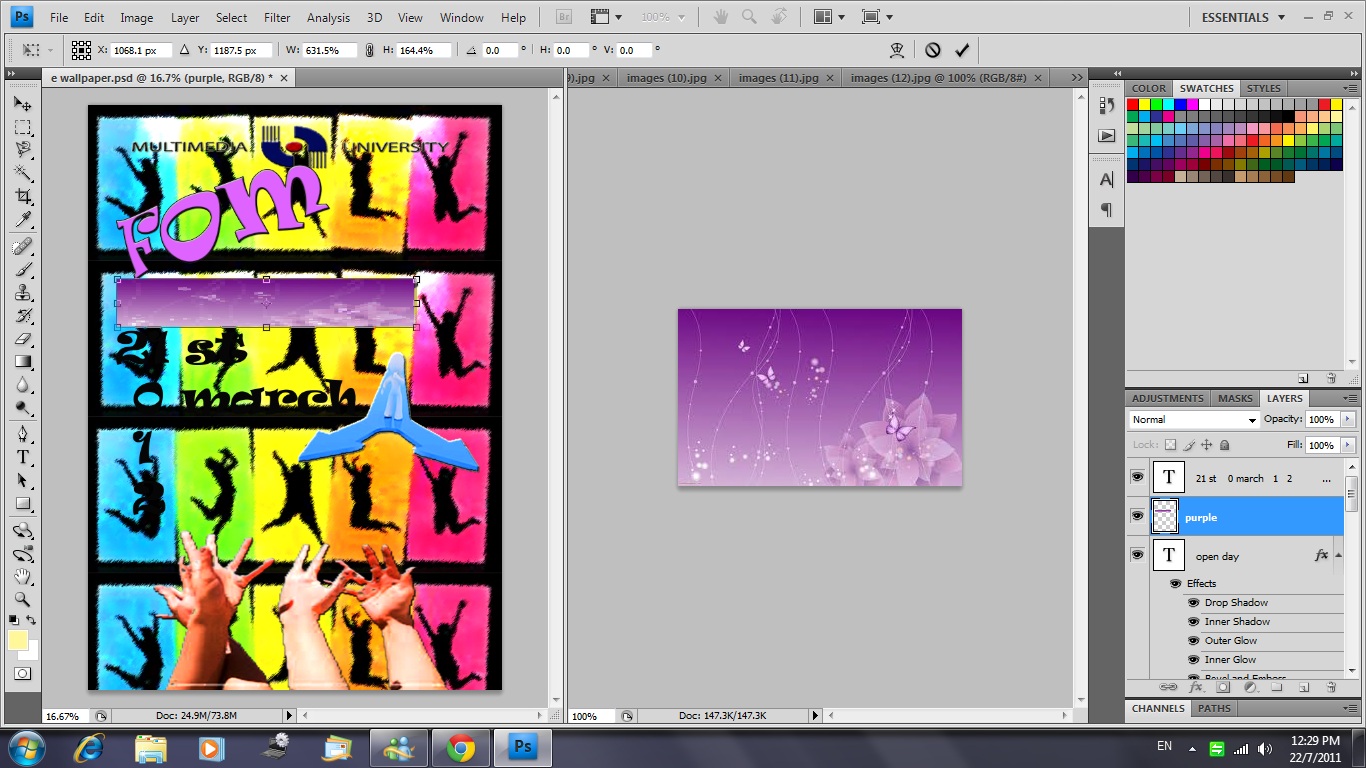
Now the words become purple colour. But i felt that the colour is a bit dark so, i clicked on the image >adjustment >brightness/contrast to change it. Besides that, i also used sponge tool to the ' arrow layer'.

After it done, i change the background which is 'jump layer' and 'jump copy1 layer' by repeated the steps above. But, this time i make it darker.

Finally, my e-wallpaper is done!!!!!!!


Thursday 14 July 2011

steps 3 & 4

                       In this steps, I started with using sponge tool to make the colour of the background a bit different.


After that, i clicked on the filter > render > lighting effect > five lights down on the jump layer and jump copy 2 layer to make it brighter.


This is the background after i used the sponge tool and added the lighting effect. 


Then, i clicked on the indicates layer visibility to all the layer except the hands layer, it is because i wanted to drop some effect on this hands layer. In the layer list double clicked on the hands layer and a blending options window appeared then selected  inner glow, Bevel and emboss, contour. 


            Next, i clicked on the horizontal type tools and wrote down the "fom open day". Then, clicked the create wrapped text and select fisheye. I also chose a purple text colour.
Last, i adjusted the level and exposure in the adjustment list to make it brighter.  


I also added some effect to the background by using the sprayed strokes. i clicked on the filter>brush strokes>sprayed stokes.

and a window like this appeared. Then adjusted the stroke length to 20 and clicked 'ok'

This is the e-wallpaper after added the effect .


Sunday 3 July 2011

steps 2 layering

Firstly, i moved the picture to the blank paper,

then, i pressed the alt button and at the same time used the move tool to copy the picture and it become my e-wallpaper background.

After that, i added the layer 1 ,layer2 mmu logo 
and layer 3 to the background picture.